1-7 : The Clone Wars

Tutorial 1-1 Intro to Photoshop
Tutorial 1-2 Raster vs. Vector
Tutorial 1-3 Marquee Tool Selection
Tutorial 1-4 Lassos and Magic Wands
Tutorial 1-5 Move Tool & Crop Tool
Tutorial 1-6 Selecting and working with Color
Tutorial 1-7 Fixing Images with the Clone Tool
Tutorial 1-8 Gradients, Fills & Erasing
Tutorial 1-9 Smudge, Blur and Sharpen Tools
Tutorial 1-10 Dodge, Burn and Sponge
Tutorial 1-11 Pen and Path Tools
Tutorial 1-12 Text Tools
Tutorial 1-13 Vector Shape Tools
Tutorial 1-14 Eyedropper / Color picker (& notes)
Tutorial 1-15 Distorting and Transforming
Tutorial 1-16 Introduction to Layers

1-7 : Introduction to Fixing Images

Intro
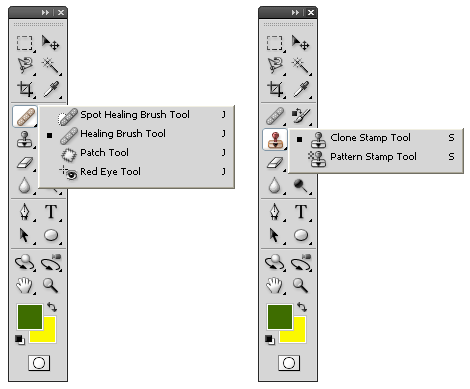
Now that you've had a taste of some of the tools and worked with color a little. It's time to switch gears and learn how incredibly useful Photoshop is when it comes to fixing up images and photographs. This tutorial will show how the Clone Tool and the Spot Healing Brush are used. These tools are used to fix damaged areas as well as copy specific areas in an image. These tools will be discussed in later tutorials in more detail, which will allow you to get some good hands-on knowledge. A video is at the bottom of this page to show you the tools in action.

Clone Stamp

Spot Healing Brush
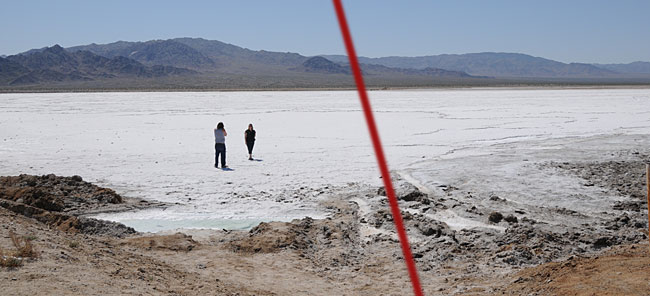
The healing brush works by looking at the pixels next to the damaged area and then repairs the image. It's a quick way to fix pen marks, tears or other blemishes in an image. Below is a photo of a salt lake in the Mojave Desert. It's a nice scene, but someone added a red line across the image and saved it. There's also a couple of people that distract from the scene. To correct the red line, we'll use the healing brush.

Spot healing brush

Right-click on the image above and select Copy Image. In Photoshop start a new drawing and then paste (CTRL + V) the image into it. To fix the red line, you'll need to activate the Spot Healing Brush (J). Now that it's active you'll see a set of options available on the option bar. Once again, you should notice some familiar ones. Make the brush size just a bit larger than the red line.

Spot Healing Tool Options

You might remember that you can hold the shift key to draw a straight line. What you want to do is pick on a spot just above the red line, hold the shift key, and pick again just below the bottom of the line. You'll see a black line appear, then the healing will begin.

You should see that the red line is gone and the image should much better, it's like magic! It might not be perfect, but it's a lot better. This is a very quick and easy way to fix parts of an image. Try some different settings, and see if you can improve on your first attempt. I find that the tool does a good job, but not a great job. It can be handy to get the job started with the Healing Brush, then clean it up with the Clone Stamp.

Clone Stamp Tool
Now that you have fixed the line, it's time to do something about those people who are standing the way. This is a good use of the clone tool. What the clone tool does is take one section of the image and clones (copy) it to another area. You can set the size and hardness of the brush tool in the option bar.

Clone Tool Options

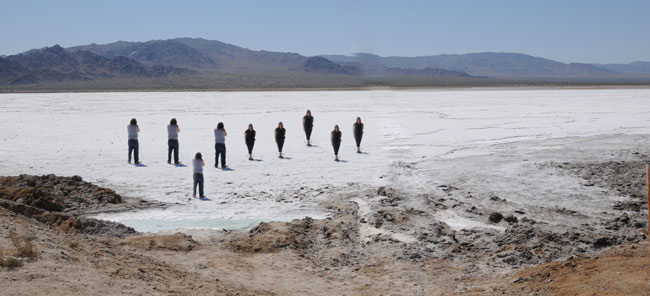
Before we remove the people, we'll make a copy of one of them first. What you want to do first is ZOOM (magnifying glass icon on the toolbar, or hit the "Z" key) in on the people. Next, activate the Clone Stamp Tool ("S") and make it just a bit wider than the person on the left. Put the tool over the person while holding the Alt key, this will change the curser to a bulls eye. Left-click samples/copies the area you are using as the original. Now move the tool over to an area that is mostly white salt. Left-click and hold while dragging the mouse. You should see a clone of the person appear. You can clone as many as you like.

Attack of the Photoshopped Clones!

Just as you have cloned the people, you can remove them. Sample part of the white salt area, and then copy over the people.

Bonus Practice - See if you can fix this image using the Clone tool. It will give you good practice at changing your tools size and figuring out how to select the best sample area.

Tip - be careful not to create a repetitive pattern when cloning. When you select the sample area, it helps to make your target area parallel to the sample area.


Conclusion
The clone tool is used a lot in touching up photos. It can be used to remove dust spots, telephone poles, and just about anything that you want out of the image. I'll usually use this over the healing brush as it gives me more control, but the healing brush can be quick. Most images need some kind of fix up, so practice with this tool as you'll be using it.

Reference
Read about genetic Cloning

Reference
To read a little more about color, visit this page

The video content presented here requires JavaScript to be enabled and the latest version of the Adobe Flash Player. If you are using a browser with JavaScript disabled please enable it now. Otherwise, please update your version of the free Adobe Flash Player by downloading here.


<< Previous Tutorial

Return to List

Next Tutorial >>

Owned and operated by The Art Department, Chester, NE
This web site is protected by Copyright 2008-2016 ©

Last Update:


Please visit our other sites:

| www.myARTdepartment.com | www.TheCenterofCreativity.com | CustomGamingDesign.com | FreeAutoCADTutorials.com |

myIllustratorsite.com | myAfterEffectssite.com | myAutoCADsite.com