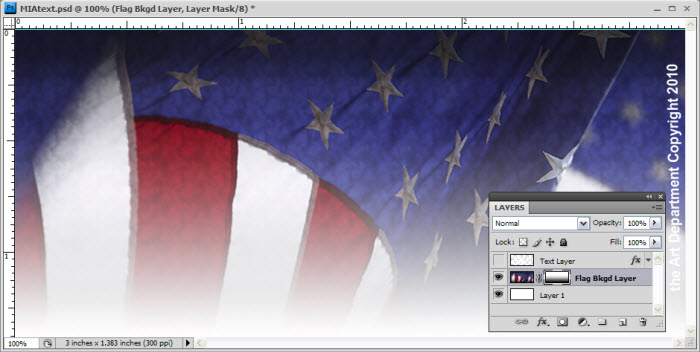
2-4 : Masks that make you look coolMasks aren't just for Mardi Gras! Photoshop makes very good use of them and once you've mastered them, you too will look very cool! There are several ways to use masks in PS from putting a frame around a photo to filling text with a picture. Or maybe you just want to mask an area and add a color adjustment to it. For more information on how masks work, review "Alpha Channels" in 2-3 as they work in the same way, using black, white, and every value in between to create a grayscale or black & white image to create a "Channels Layer". Also, check out the video at the bottom of the page, for more information. Masks are simply "Selections" (see Level 1 Tutorials). Selections can be made in several ways, using "Vector Masks", or "Shape" tools (Which automatically make their own masks using the foreground color as the fill.), any of the "Lasso" tools, the "Magic Wand", or the "Marquee". Once a selection is made, a mask can then be made of that shape. You can make a selection then "Invert" it to get the reverse of what is selected, as well. Keep in mind that what is black on your mask layer will block the image completely and what is white will show the image. In this tutorial I will start by showing you how to fill text with a photo. Using the same Made In America file from 2-3 we will take the flag background and fill the text with it. Open the file and in the "Layers Palette" you will see two layers, the "Text Layer" and below that, the "Flag Bkgd Layer". Lets turn off the visibility of the "Text Layer" by clicking on the "eye" icon next to the layer name. You should have something that looks like this: On the bottom of the "Layers Palette" you will find a small "Mask" icon -You have now made a mask that allows only the flag image to only show through where the text is- That was pretty simple to do, wasn't it? You will now see a mask layer in your "Channels Palette" as well. And there is a "Link" icon between the two on that layer, telling you that the two are linked together. You can link and unlink them by clicking on the icon. When they are unlinked, you can move the image around and the mask stays in place. Try this and see how you can move the flag around with the mask to get the exact look that you want. When they are linked, both the image and the mask move together.
If you "Right-Click" on the "Mask" image on the layer, you will see a drop down menu that gives you several options. They are pretty self-explanatory but once you "Apply Mask" your image will be changed forever (well, unless you "UNDO"). If you don't apply the mask, your image will always be there unaltered, incase you want to make changes to it at a later date. You can also, "Disable" the mask and make changes to the image, then "Enable" the mask again. Or if you want to remove it easily, just "Click and Drag" the mask icon, on the layer, to the trash. A dialog box will pop up and ask if you want to "Apply" it or "Delete" it. Think about what will happen if you Apply the mask in this example - and then your boss says he wants the text changed to "Made in the USA". This happens more often than us designers want, so it's always best to keep our options open. Also, a layer with a mask can use the same options as any layer, you can add a shadow or a bevel to it. AND, you can add a second mask to a layer, though that's really something for the more advanced project, but it works the same way. Ok, with all that said, lets make a quick gradient mask to fade the image away. This is a technique that you'll probably want to use a lot (for another example see Tutorial 5-2). There are a couple of ways to achieve this in PS but this way, you don't destroy the image and can easily adjust the fade. In this next quick tutorial I will show you how to gradually fade the background. Using the same Made In America file, we will take the flag background and fade it out to nothing. Close down what you have, if it's still open and we'll start fresh (don't save your previous changes or do a "Save As").
Using the "Gradient" tool, "Click and Drag" from the top to the bottom of the image, if you hold down the "CTRL" key, your direction will be constrained. You'll see now that the image fades out and you can see the background behind it.
If you want this to be white, you will need to "add a new layer" below the "Flag" layer and "Fill" it with white. You can also adjust the "Gradient" tool to have a sharper drop off in color. For this example I used a black to white gradient. However, you can use any of your presets, even the colored ones, keep in mind that the color will be converted to grayscale in the mask layer (because channels are actually grayscale). For more information on how to work with gradients, please refer to 1-8.
You can use any "Gradient Style", now would be a good time to play with your options and practice making or adjusting gradients using the "Gradient Tool Bar".
Conclusion Reference |
||||
<< Previous Tutorial |
Return to List |
Next Tutorial >> |
||

Owned and operated by The Art Department, Chester, NE |
Last Update: |