2-09 : Actions and AutomationIntroduction Think about your morning routine. You wake up, hit the snooze button, get up, shower, brush your teeth, get dressed, use the toilet, make coffee, eat breakfast and drive to work. Wouldn't it be great if you could sleep through all of that? I might have a series of photos that I Open > Apply Auto Color > Apply Auto Levels > resize to 800x600, and save in a different folder. It would be great if I could just press a button each time I open an image. It would be AWESOME if I could do that to a whole folder at once (and I could sleep while Photoshop does all the work). Well Photoshop is awesome. Actions are awesome. Actions free you from the regular routines that you use a lot (or even once). The best part is that they are easy to make and easy to use. Once you start using these, you'll be hooked.
Creating an Action
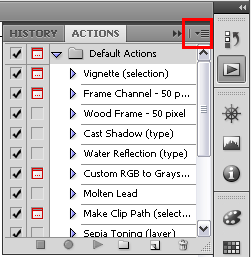
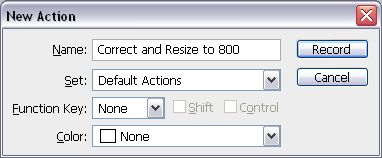
Looks interesting already. Once again we have to find the miniature button on the top right of the palette. From here, click on New Action. You'll see a dialog box open - give your action a descriptive name and press Record. . Once you press Record, Photoshop is tracking your every move and including it as part of the script. Do the following procedures:
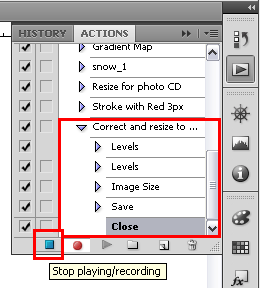
Now go back to the Action Palette and press the Stop Recording button (indicated in the small red box below).
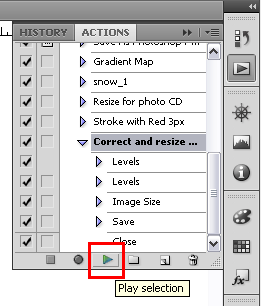
Pressing this button ends the sequence of events for the action. You will also see all the steps that were recorded in this action (shown in the larger red box above). It will list Levels twice even if you did the steps correctly. Using an Action Go back to the Action Palette, select your Action (not a step that is included in it) and press Play.
If all goes according to plan, the image will quickly be modified and then saved to the current folder. Hope you listened to me and made a copy! Another thing that makes actions so awesome is that you can skip a step within the Action when you need to. Suppose that you don't want to resize a particular file. Just uncheck the box next to Image Size. Try creating your own script. Imagine that you are using fancy text for headings throughout a website. Start recording before you make a new file, and end it before you save it. Add a drop shadow and bevel to the text while recording. Automating a Task / Batch Processing
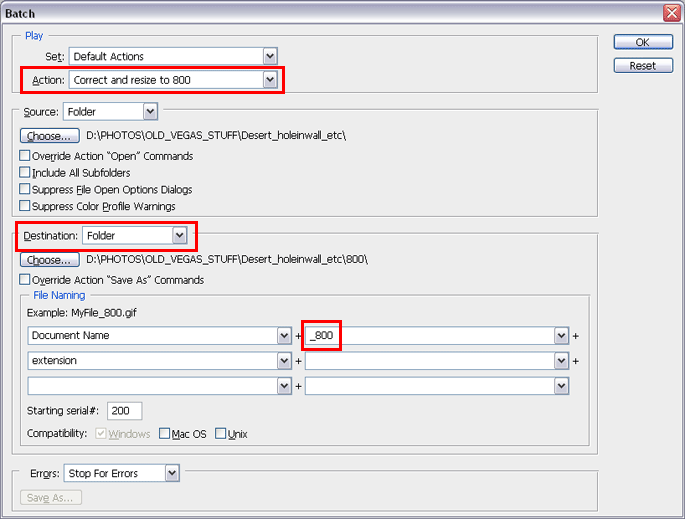
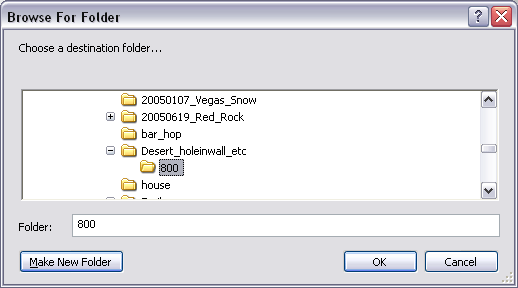
In this example, I have first selected the Action that I want. Then I pick the Source folder that contains the images that I want to convert. Next I need to pick a Destination for the converted images (it can be the same folder, but I HIGHLY recommend against this as it can't be undone). Pick the Choose button to select the destination folder.
I also like to change the file name - in this case, I've appended the filename with _800 to let me know that they've been resized. I'm also putting the converted files in a folder under the source so that I can find them easier. Double check everything you have and press OK. You'll see the images flash up on the screen one-by-one as they are converted. You can't use Photoshop until the process is complete, so take a nap - you've earned it!
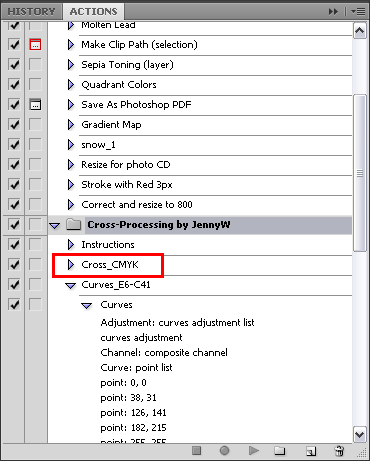
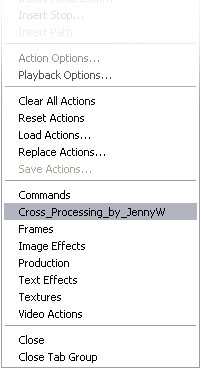
Importing Actions First, find a site that offers some free Actions. Try this one, for example. Look for the download link to your desktop or some other folder. If you install it in the Actions folder (Program Files\Adobe\Adobe Photoshop CS4\Presets\Actions) you will have to reload Photoshop to see it. For now download it somewhere else - I'll explain the other way of loading in a moment. This is actually a series of Actions to create a 'Cross Processed' look. This was done in the film days by developing negative film in slide film chemicals or vice versa. In the Actions palette, click on the small arrow and find Load Actions and navigate to the folder where you saved the .ATN file. Find the file and load it. Now you will see it in your list of Actions.
What you see is a collection of Actions under "Cross-Processing by JennyW" If you have an image open, you can select the Cross_CMYK action and press play. Here's what it did to a photo of Tosh (mouse-over for the new image). As mentioned earlier, if you saved the .ATN file in the proper folder - you had to restart Photoshop. If you did this open the Action palette, click on the small arrow and you will now see the new set in the list. Click on the new group to load it for use.
Conclusion Reference |
|||
<< Previous Tutorial |
Return to List |
Next Tutorial >> |
|
Owned and operated by The Art Department, Chester, NE |
Last Update: |
