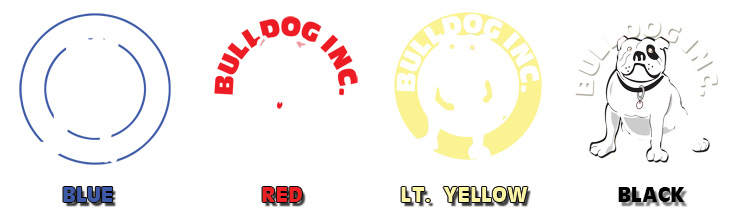
4-8 : Graphics for Screen PrintingScreen Printing CMYK separations= Colors are a magical thing; mix one with another and get something totally different! With CMYK Separations you are taking the 4 (semi transparent) basic colors and blending them together using little tiny dots to create the illusion of another color. If you look really close at a silk screen print... it's just different sized dots. The bigger the dot, the more percentage of that color is laid down. Spot Color separations= As opposed to the semi-transparent CYMK ink, Spot Color ink is generally opaque. By using halftones you can cut down on the color runs that you will need. For instance in the red screen, we could add a halftone tone to just the ears, allowing the white from the substrate to make them look pink. In the example below, I used solid lt. yellow for the spots and his eyes, as well as the fill for the banner, combining those 3 similar colors into one. though I could add a halftone to the red screen to make the spots look more orange. When over lapping colors, it is important to run the screens in the correct sequence. In this case we would lay down the lt. yellow then the red on top of that so the halftone in the spots would overlap/on top of the solid yellow, giving us orange. As a general rule, the Black is always last. Working from back to front in order of layers... I also print my lightest colors first, ending with my darkest because there is less chance of the color below, bleeding through. That gives you some idea of what you need and why... For Full Color Seps, you design your image (preferably to size and at 300 DPI), send your CMYK file to your client or screen printer for them to RIP it into separate colors. Spot Color seps really should be setup manually. I find it easiest to put each color on it's own layer. However, you can check with your Screen Printer, they may have a program to separate spot colors easily.
Another choice for printing T-shirts is to use a T-shirt inkjet paper, though you are limited by the size that your printer will print. These types of papers are good for limited runs (Family reunions or Group outings where you want to all look make a statement) or prototype shirts to show a client. You simply print them as you would a piece of paper, there will be fairly simple instructions in the in the packaging. You have to be careful when you wash these, the color will bleed and they will fade and crack over time. Things to keep in mind... no matter how you are printing your design! Lighter colored substrates are easier to print on. If you are printing bright colors on a dark substrate, you will need to make a white screen (that is the shape of all of your screens put together) that will print first and then the colors go over that, so the dark background doesn't bleed through and dull your colors (unless that is by design). However if you are using transfer paper, you just cut the paper to the shape that you want, there is no need to setup a white screen, your printer won't print white ink, at least none of my printers do. OK, with all that said, let's try something simple, using one color; after all this is the cheapest screen print option. You can take your color image and convert it to Grey-Scale (3-6) and have it printed as a Halftone. You can also add a Filter to it using the Filter Gallery (2-5), though this doesn't always look good with every graphic. You need to have a high contrast image in order to get enough detail. You may have to play with the Brightness and Contrast Levels (3-2) and/or add a Texture filter to the original before get the best results.
Conclusion Reference "Where did you say I could get that great software that makes separating artwork easy?" "I want to get a better understanding of how to Screen Print" "I have aced this tutorial and want to get a job now!" Hire me! |
||||
<< Previous Tutorial |
Return to List |
Next Tutorial >> |
||
|
||||
 A lot has changed in the screen printing industry in recent years. From the file types that can be used to the way they are processed. It used to be that you had to have an expensive stand alone RIP (Raster Image Processor), now you can output your images from an inkjet or laser printer and with the
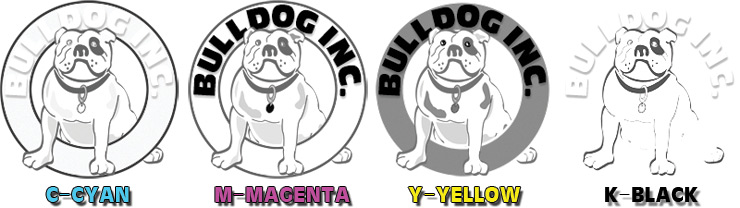


Owned and operated by The Art Department, Chester, NE |
Last Update: |