1-16 : Layering it on thick

Tutorial 1-1 Intro to Photoshop
Tutorial 1-2 Raster vs. Vector
Tutorial 1-3 Marquee Tool Selection
Tutorial 1-4 Lassos and Magic Wands
Tutorial 1-5 Move Tool & Crop Tool
Tutorial 1-6 Selecting and working with Color
Tutorial 1-7 Fixing Images with the Clone Tool
Tutorial 1-8 Gradients, Fills & Erasing
Tutorial 1-9 Smudge, Blur and Sharpen Tools
Tutorial 1-10 Dodge, Burn and Sponge
Tutorial 1-11 Pen and Path Tools
Tutorial 1-12 Text Tools
Tutorial 1-13 Vector Shape Tools
Tutorial 1-14 Eyedropper / Color picker (& notes)
Tutorial 1-15 Distorting and Skewing an image
Tutorial 1-16 Introduction to Layers

1-16 : Introduction to Layers

Intro
In a previous lesson (1-13), you were first shown layers. Layers are very important in Photoshop unless you are doing a simple design or minor processing to a photo. For this introduction, I will just steal from that lesson and save myself some typing. Check out the video at the bottom of the page for more information.

Layers allow to you to work in different areas of your image without affecting other parts. For example, when you created text, you created text on a new layer. That way, you could still change the text, and not affect the background. If your image was all one layer, and changes you made to your text would appear on the background color. Layers allow you to make a fancy background on one layer, make a border on another, text on another, and foreground object on yet another. You can have as many layers as you like, but you need to keep track of them.

First steps
Start by creating a new image. Before pressing OK, have a look at the dialog box.

New Image Dialog Box in Photoshop

When you create a new image, it always starts with one layer. If you have chosen your background to be white or to have a background color, this default layer is always called Background and it is locked, but both can be changed later. I've highlighted the droplist to shop you the options: White (should be obvious and locked), Background Color (uses the current background color and is locked) and Transparent (empty pixels and is unlocked). Now that you've seen the options, pick White and press OK.

You now have a blank canvas and can start your design. If you try to Erase the white background, you'll see that you can only erase and reveal the background color selected on the toolbar. To truly erase pixels and get transparent areas, you need to change the name of the layer. Open up the Layout Window by picking on the layer icon. This will expand the Window and reveal all current layers. You should only see one - Background.

Layer Window

Double-click on the name 'Background' and you will be able to change the name to anything you want.

New Layer Dialog

Actually, you CAN call your new layer Background if you want to, as you are creating a "New Layer" and removing the default "Background" layer. You can also "Right-click" on the layer from the "Layer Window" and click on "Layer from Background" this too will open the "New Layer" box. Now you have a new layer, you can delete pixels and leave a transparent area with the eraser. On a transparent layer, when you "Double-click" on the layer name in the Layer Window, you won't see the dialog box, and instead can just type in a new name.

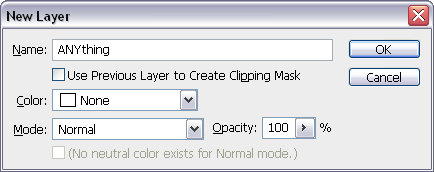
To create another new layer, click on the small triangle on the Layer Window. Press this (circled in red below) and choose the first item in the drop down list "New Layer". . You'll also see that there are a number of options for layers as well. They are all accessed in this way. Another way to create a new layer is to press CTRL+SHIFT+N

New Layer in Photoshop

For now, don't worry about the other options. Most of the them will be covered in later tutorials. Notice that all new layers by default have a transparent background- that's so you can see what is below the new layer.

You can make a duplicate layer by pressing on the small triangle and choosing the second item in the list. This assumes that you will have a layer selected and then Photoshop will create an exact duplicate of that layer. This is also useful because you keep an original copy (turn the visibility off and on by clicking on the eyeball to the left of the layer name) and work on the duplicate. If you screw something up, you still have the original to go back to.

This option and others in the list are also available by Right-Clicking on the layer's name. I'm not going to go through every option right now, some are obvious and others will be used in later tutorials. For now it's good to know how to use the basics.

Merging Layers
Let's say that you have blended two images together and they are on two layers. You can select both layers by holding down the "CTRL" key and selecting each layer, so that they are both highlighted, then "Right-Click" on one of them and select "Merge Layers". Or go to the small triangle (I'll have to see if there is a name for that!) and choose "Merge Layers". if you want to merge all of the layers of your image together, select "Flatten Layers". Remember, once this is done you can not edit the objects separately anymore because they are now one. (if that isn't what you really wanted to do... UNDO, UNDO, UNDO!)

Linking Layers
To link layers together so that they can be moved and edited together is done in the same menu as "Flatten". First you have to select more than one layer. Press and hold "CTRL" and pick on layers you want to link. (Pressing SHIFT while you select layers will select all layers in between your first and second selection.) You'll see a couple of chain links appear on those layers. Now when you move one layer, the other moves with it. This is perfect for when you have several aspects of the design that should be grouped together. You can also moved linked layers into their own "Group".


Conclusion
This tutorial has provided a brief introduction to layers. By now you should have a basic knowledge of how they work. I recommend that you practice with layers to see how they work and how to access their different options. Layers are important in most design work and can be very useful in photo editing image compositing as well. Later tutorials will deal with layers and you'll find them easier to follow if you are familiar with basic layer techniques.

Reference
Check out Layers Magazine for Photoshop users
Look for Photoshop Books to learn about the tools used in this level

The video content presented here requires JavaScript to be enabled and the latest version of the Adobe Flash Player. If you are using a browser with JavaScript disabled please enable it now. Otherwise, please update your version of the free Adobe Flash Player by downloading here.


<< Previous Tutorial

Return to List

Next Level >>

Owned and operated by The Art Department, Chester, NE
This web site is protected by Copyright 2008 - 2017 ©

Last Update:


Please visit our other sites:

| www.myARTdepartment.com | www.TheCenterofCreativity.com | CustomGamingDesign.com | FreeAutoCADTutorials.com |

myIllustratorsite.com | myAfterEffectssite.com | myAutoCADsite.com