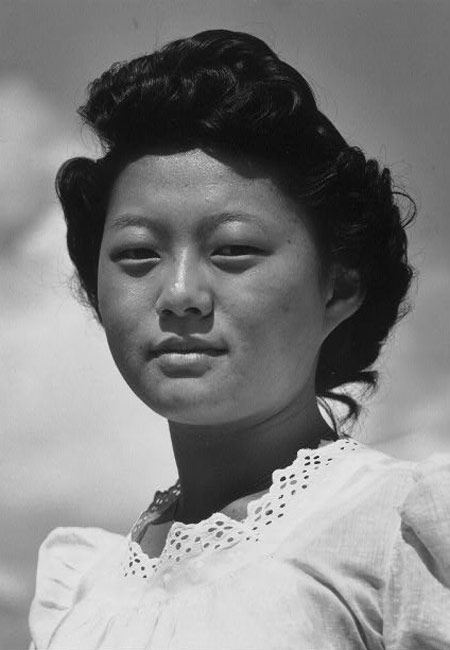
3-13 : Hand Coloring a B&W PhotosIntro This tutorial will show a technique I use for adding color to a black and white print to give it a subtle hand tinted look. It can be used for touching up old photos you have or restoring color to faded color photos. The Goal The example above is fairly easy image to change. I added just 4 colors - a purple for the dress, blue for the sky, orange for the face and red for the lips. The subtle tones are created by the gray tones in the original photo.
Hand Tinting an Image With the new layer active, select a color that you want for the dress. Use the foreground color picker. Use the brush tool to paint over the dress, but don't go near the edge for now. Use high value for hardness. Once you have some color on the screen, change the layer's opacity to reveal the image underneath. This will give you an idea of how your color will look. Try an Opacity setting of between 20 and 30. If you don't like the color, you can change it with the Hue and Saturation adjustment (Image > Adjustments > Hue/Saturation). Make the Brush smaller by pressing the [ key or larger with the ] key. This allows you to cover large areas or finer details. Color in the dress as well as you can. Create a new layer. Now change your color to a blue for the sky and repeat the process. You'll find that you might have to change the hue to get a natural looking blue. You can color over the hair that curls out the sky. Add a new layer. Choose an orange or other flesh tone color for the face. Remember that you can change the hue later. Color the face in and go right up to the hairline. With the face colored in, erase the color from the eyes to return them to white. Erase the area over the lips and color them in with a red. Here is another version I did that uses the same file, but with less opacity. This is a simple approach that gives nice results. You can use this technique on any black and white image and some will be more complex than others. Most of the time you will need to choose your own colors as you won't know what they were originally. To restore color to a faded photo, I recommend changing it to black and white before you start. Then use the original for reference when adding color. Conclusion Reference
|
|||
<< Previous Tutorial |
Return to List |
Next Tutorial >> |
|
Owned and operated by The Art Department, Chester, NE |
Last Update: |
