3-5 : Increasing SharpnessIntro I spend a lot of time online visiting digital photography forums. They're a great source of knowledge especially if you have a complicated Digital SLR. The reason I mention this is because in the 1,000's of threads that I've read there are 3 common processes used to fix an image - exposure, color and sharpening. You might find that your images are a little soft, or even slightly out of focus. Sharpening can fix this. This tutorial will show you how it works, and how it can be overused. You'll see three methods - Unsharp Mask, Smart Sharpen and High Pass Filter. Examples of Unsharp Mask
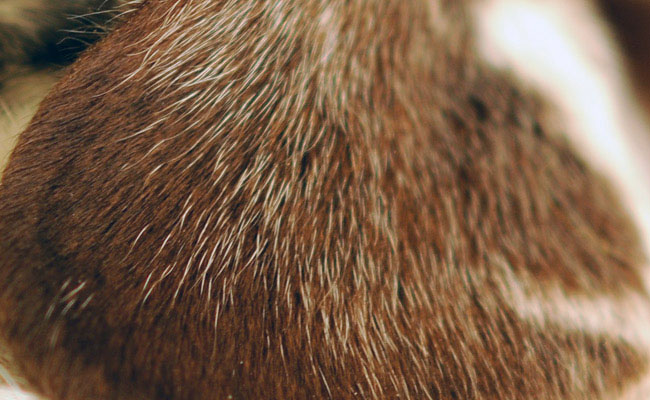
So what does a soft image look like? Below is an image of my dog's ear (cropped in at 100%) and it was shot with a great camera with a very sharp lens. The problem is that due to the low light I had to use a slow shutter speed. If you move your mouse over it, you will see what the image looks like after adding the USM.
So you see that with just a subtle amount of the USM filter being used, the image looks crisper and clearer. Of course, it can also be overdone.
Below is a photo I took of a deer and although the original is acceptable, it is a little soft due to a slow shutter speed. The example shows three different levels of USM. On the left is the original, then I have added minimal (left center), moderate (right center), and a lot (right) of USM.
As you can see, the 'look' of the image can be drastically transformed using sharpness. I find that minimal to moderate will work in most situations. If you add too much, the photo becomes unrealistic (although that can be a look you're going for). Using Unsharp Mask
You'll notice that there are 3 sliders and a preview button. The preview button should be self explanatory. The Amount slider allows you select the amount of sharpening that you want. As shown above at 81%, that's a little overboard. Usually somewhere in the 50 range will suffice. Below that is the Radius slider. This will change effect dramatically, and is wholly dependent upon image size. If you have a smaller image, this number should be lower. Image that the individual pixels are being 'sharpened' and the more you sharpen the less realistic your image will be. The last slider is for Threshold and a lower number increases the amount of the effect. The bottom line is that to use this tool effectively, you will need to adjust it differently for each image. Additionally, you can first select a section of the image and then apply this filter. Here is the deer image if you want to practice with this tool. Smart Sharpen
Notice that you still have the Amount and Radius, but also you can tell it what you are trying to fix under Remove. The big difference with Smart Sharpen is that you can control how the Shadows and Highlights are modified.
Here you have 3 sliders. The Fade Amount controls the amount of sharpening that will take place. The higher the number, the more the effect fades - or is least apparent. Tonal Width affects the variation of Shadow that will sharpen. A lower number means less of the shadows will be sharpened. Radius is used to find the areas defined as Shadow. A smaller radius won't look as far to the neighboring pixels to find more shadow. So you can see how Smart Sharpen gives you a lot more flexibility than the regular Unsharp Mask. Like other tools, it depends on how much time you want to put into an image. Sharpening with the High Pass Filter
Next you need to change the mode of this layer to "Hard Light" - this is shown in the image below.
Once you have the layer mode set, you need to adjust the Opacity slider (shown above in red). As you make this adjustment, you will be able to see the effect on your image. This method is easy to use and has the benefit of retaining the original image. You can also erase part of the top sharpened layer to leave some areas soft. Other Issues A common by-product of oversharpening is the creation of a 'halo'. This is generally an undesirable effect that will indicate that you need more practice in either sharpening or taking sharper photos. Move your mouse over the image below to see an extreme example of a halo.
A halo won't always be as obvious as the example above, but it is something too look for, and is a sign you've gone too far. Conclusion So far in this level you've been shown how to correct exposure, color and sharpness. Ideally, you want to get the best image to start with out of your camera. Beyond that, everything else is a luxury. The rest of this level will show you various techniques to use on your photos to create new and different works from a single image. Reference
|
|||
<< Previous Tutorial |
Return to List |
Next Tutorial >> |
|


Owned and operated by The Art Department, Chester, NE |
Last Update: |