3-7 : Resizing and CroppingIntro This tutorial will give you some guidelines towards these functions and lead into the next tutorial that deals with internet and email images. I recommend turning on your rulers when working with image resizing and cropping. This is done by navigating to View > Rulers (or CTRL+R) - this will turn them on or off and tells you how large your image or cropped area will be. (or you can open the "info" box window and it will tell tell you what size your image is.) The video at the bottom will show more information, including how to make a digital matte. Image Sizes for Printing
You'll notice that 8-1/2x11 is not listed. That's because it is not considered a standard Photographic size even though most printer paper comes in that size. Also, most printers do print right to the edge of the paper. But you won't find many frames that size, and will end up cutting your image to fit a frame. The problem with this is that the format (ratio between length and width) is not the same as most cameras. To make your image fit into these sizes for printing and framing, you will need to resize and crop. Now that you know the sizes, you need to look at at the printer you are using. Most printers for home use will print at least 300dpi - that means it will print 300 pixels (or dots) per inch (in general terms). Sidenote: Printer vary greatly in quality. Toner and Ink as well as the paper you use will affect your print as well. I'm a believer in using the best possible components (usually brand name instead of generic) to get the best prints.
So here's what it comes down to. If you want to print a 5x7 print at 300dpi, your image size should be 1500 pixels x2100 pixels for best results. Of course you won't always get images the size you want, but bigger images make better prints - just like bigger negatives make better prints. Images on the internet are using a screen resolution of 72 dpi. Below is a table that will help you plan your enlargements based on your image size. Of course, you can print any image to any size if quality is not your main concern.
Remember that these are just numbers and some prints that meet the requirements for size look bad as enlargements due to underexposure or noise, and some that are under the recommended size look great due to proper exposure and sharpness. Image Size
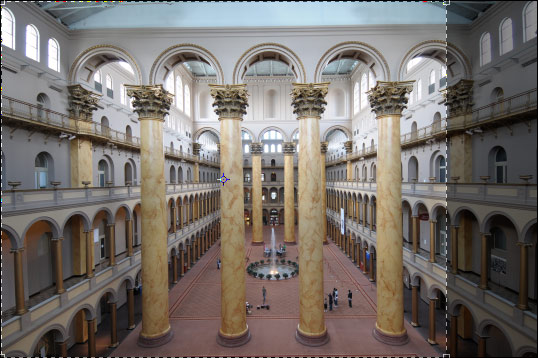
You will see that you can set the size numerically and then choose the unit After resizing your image, have a look at it with a 100% zoom. It's always good to verify the quality of an image after resizing or cropping. Even with good intentions, mistakes can be made. You have the choice of resizing by either pixel size or by document size and each has a droplist of options. If you know what size you need, this is a great way to resize your image. Keep in mind that your image may not have the same aspect ratio as is required by the document, so you may need to resize to the largest size then crop it. If you are using an image on a web pages, resize it to the size that it will be used at on the page (save the original). If you put a 3000x2000 pixel image on your site and then force it to be 300x200, you will still have to load the large image and it will slow down your page. You'll often see this when people have a number of large images on a page, but they appear to be small - what a pain in the butt to have to wait! Cropping Images Below is an image that is composed well, but to randomly crop it as an 8x10 would not work well, so I have to crop it exactly in the center. Move your mouse over the image to see the difference.
What you choose to crop out of your images is a personal decision, but can also make or break a photo depending upon what is left. This image shows that in my case if I want to print out an 8x10, I have to crop my image somehow. Note that some labs will print an 8x12 print to save you from cropping anything out. Also, you can have the image printed bigger and then cut it yourself. If you have your rulers on (see intro) you can quickly see how large your image is. If you want to change your units, you can just right-click on the ruler and select the unit you want.
You also need to pay attention to the options bar when cropping. It allows to select your size and resolution as you crop.
From the image above you can see that that I am cropping my image to an 8x10 print at 300dpi. When entering numbers for the width and height, it is important to add the units (in = inches, px = pixels). You need to enter the units in each box. If you don't enter units, Photoshop will use the units in the rulers (even if they are turned off). You can also switch the values by clicking on the arrows between them. This way you can crop to an 8x10 vertical or quickly look at an 8x10 horizontal. Move your mouse over the image below to see how the image can take on a different look.
In the 'Photoshop Dictionary', a vertical image is referred to as Portrait and a horizontal image is referred to as Landscape. These terms are a great guide to when to use each. Most landscapes look good in a horizontal image, and most portraits look best in a vertical image. Conclusion Crop carefully and don't overdo it. Look for better composition when cropping - many images can be vastly improved by removing unwanted objects (like your 'ex'). With good exposure, good color and sharpness, you will be able to enjoy hanging prints around your home. It's also a good idea to save an original version before cropping the image. Reference
|
|||||||||||||||||||||||||||||||||||||||||||||||||||||
<< Previous Tutorial |
Return to List |
Next Tutorial >> |
|||||||||||||||||||||||||||||||||||||||||||||||||||


Owned and operated by The Art Department, Chester, NE |
Last Update: |